Specflow Tutorial
Introduction to SpecFlow Installation of SpecFlowWriting first SpecFlow test in Visual Studio Writing step definitions for a SpecFlow feature file Executing SpecFlow scenarios and feature files Using SpecFlow runner to execute the feature files Using tags in SpecFlow Passing parameters to steps Data table in SpecFlow Scenario Background Scenario outline Hooks in SpecFlow Executing Selenium tests with SpecFlow Executing the failed test multiple times Sharing selenium Webdriver instance in SpecFlow Writing to SpecFlow HTML reportsSpecflow Runner
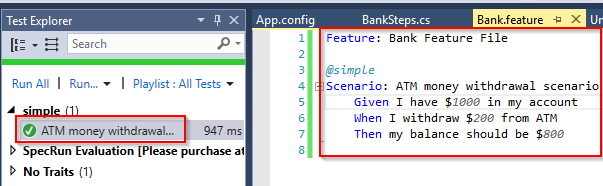
Earlier we have seen how to execute the tests using Microsoft Unit Testing Framework. Now we are going to look at how to execute the scenarios using SpecFlow runner. To execute the scenarios using Specflow Runner, you will have to install below package to your project. Once the package is installed, you should see below references in your project.
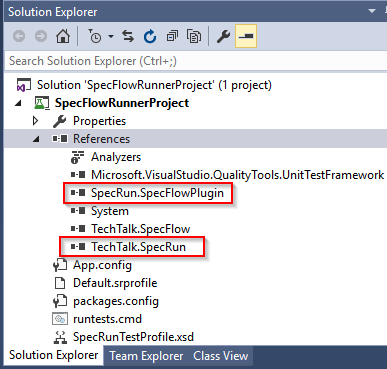 Ensure that app.config file contains SpecRun runner as shown in below XML file.
<?xml version="1.0" encoding="utf-8"?>
<configuration>
<configSections>
  <section name="specFlow" type="TechTalk.SpecFlow.Configuration.ConfigurationSectionHandler, TechTalk.SpecFlow" />
</configSections>
<specFlow>
 <unitTestProvider name="SpecRun" />
 <plugins>
 <add name="SpecRun" />
 </plugins>
</specFlow>
</configuration>
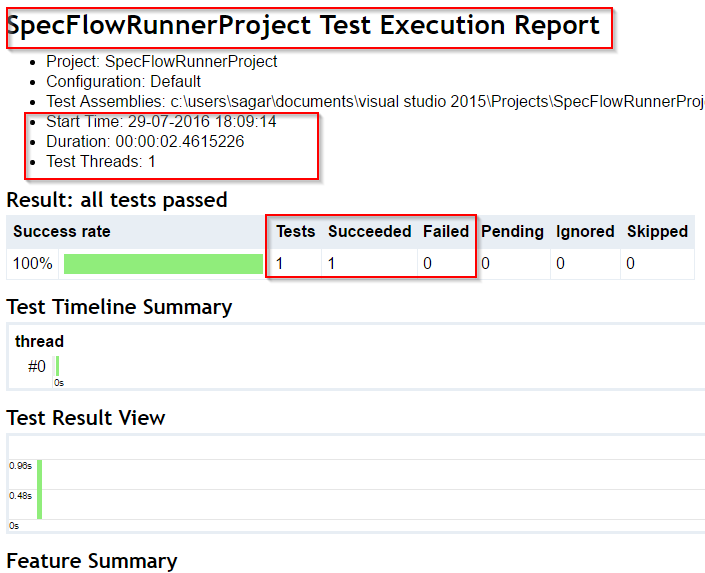
 After scenario execution, it generates the report as shown in below image.
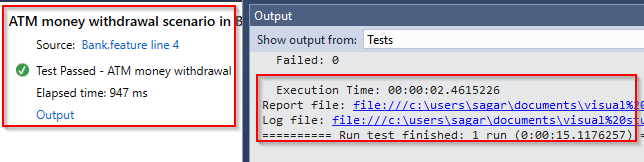
Web development and Automation testing
solutions delivered!!