git Tutorial
Introduction Installing Git Understanding Git architecture Initializing the new Git respository Cloning new Git repository .git directory in Git repository Viewing Git configuration First time Git configuration Using SSH keys with Git Checking Git status Adding files into staging area in Git Committing changes to the local repository Ignoring files using .gitignore Viewing the history of commits Viewing the file contents in working directory, staging area and repository Viewing difference between files Viewing the history of files Git revert Git Reset git reflog Creating and switching to new branches in Git Viewing existing branches Merging branches Resolving conflicts Rebase Deleting branches Renaming the branch in Git Push Pull Stashing the changes in Git Tags in Git Patches in Git Creating new repository on GitHub Pushing local repository to remote repository like GitHub IntelliJ IDEAInstalling git
Now let us see how to install the git. Visit git official download page and download the git for your platform. On windows, you will download exe file. Just double click on it and installation process will start. Once the installation is complete, add the git directory to the path environment variable as shown in below image.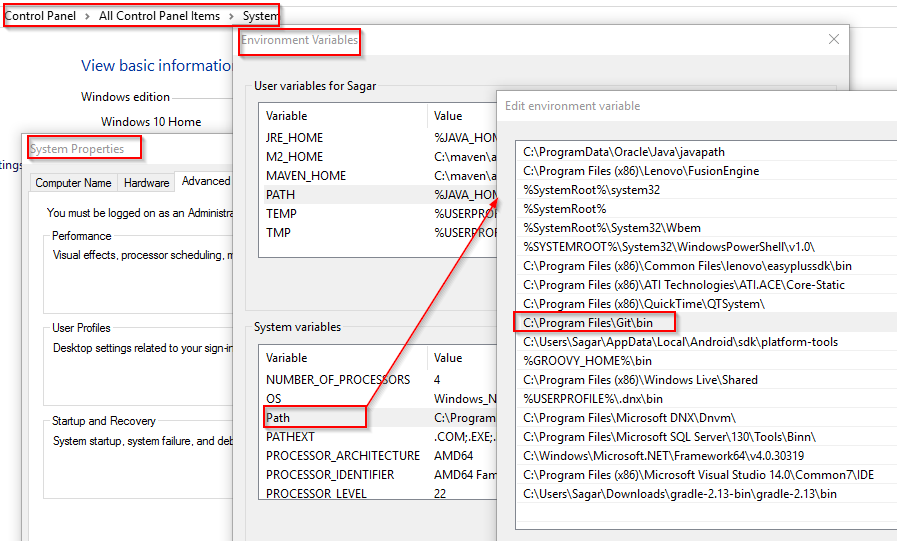 To check that git is installed properly, open the git bash and type below command.
git –version
Web development and Automation testing
solutions delivered!!