git Tutorial
Introduction Installing Git Understanding Git architecture Initializing the new Git respository Cloning new Git repository .git directory in Git repository Viewing Git configuration First time Git configuration Using SSH keys with Git Checking Git status Adding files into staging area in Git Committing changes to the local repository Ignoring files using .gitignore Viewing the history of commits Viewing the file contents in working directory, staging area and repository Viewing difference between files Viewing the history of files Git revert Git Reset git reflog Creating and switching to new branches in Git Viewing existing branches Merging branches Resolving conflicts Rebase Deleting branches Renaming the branch in Git Push Pull Stashing the changes in Git Tags in Git Patches in Git Creating new repository on GitHub Pushing local repository to remote repository like GitHub IntelliJ IDEAStaging area in git
As mentioned in the article on Git architecture, we know that Git has one feature called as Staging area. Staging area contains the list of changes that will be committed into the repository. So before committing anything into repository, you have to add the files into staging area. Below image would be useful to understand the staging area (Also called as index or cache) Below command shows sample output of git add command. Note that we had one untracked file – f1.txt To add this file into staging area, we have used git add f1.txt command. After the file is added into staging area, git status shows that file in changes to be committed section.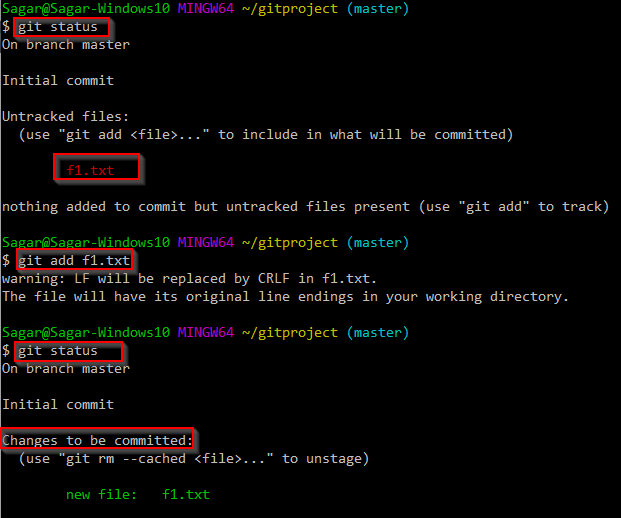 More add commands –
- git add . : adds everything to staging area except removed files
- git add -u: adds everything except new files
- git add -A : It is as good as above 2 commands combined together
Web development and Automation testing
solutions delivered!!